I Thought My System Was Bulletproof. Then My Batteries Started Dying.
When I first started building off-grid battery banks for clients around 2019, I assumed the hardest part was picking the right panels and the right controller. Get those two right, and the rest should just fall into place, right? I figured if I slapped a solid EPEVER MPPT charge controller on a decent string of panels, the battery side would take care of itself. Big mistake.
I learned that lesson the hard way. My third major project, a cabin setup in East Texas, had a $3,200 battery bank of LiFePO4 cells that was dead flat inside six months. Not degraded—dead. The client was furious, and rightfully so. That failure cost me nearly a month of goodwill and a ton of late nights troubleshooting a problem I had created on day one of the install.
Here's the thing I wish someone had sat me down and told me before I started: your EPEVER solar controller is incredibly smart, but it cannot read your mind. If you don't tell it exactly what kind of battery you have and how you want it treated, it'll make assumptions. And those assumptions can cost you.
The Problem Everyone Misses: The Battery Voltage Setting
The most common question I field now is, "What voltage should a LiFePO4 battery be?" People assume that if they buy a "12V" LiFePO4 battery and connect it to an EPEVER 50A MPPT charge controller, the controller will automatically know what to do. From the outside, it looks like a plug-and-play world. The reality is way more dangerous.
The default settings on your EPEVER solar controller are almost certainly designed for lead-acid (AGM or Flooded) batteries. If you just plug in your lithium bank, the controller will overcharge or undercharge it, depending on the phase of the moon. People think an incorrect voltage setting causes slow performance. Actually, it causes permanent damage. The causation runs the other way—the bad voltage causes the battery death, which then looks like poor performance.
The Hidden Danger in Your EPEVER Settings
I don't have hard data on how many systems fail because of this exact issue, but based on the dozens of calls I've taken over the last two years, my sense is it’s around 30-40% of first-time lithium setups. That's a ton of preventable mistakes.
The core issue is the absorption and float voltages. A standard AGM profile might hold 14.4V, then drop to a 13.5V float. If you apply that to a LiFePO4 battery, you're holding the cells at a stress point for way too long. You might shorten the lifespan by half. Conversely, if the profile is too low, you never get a full charge, and the BMS will keep cutting out.
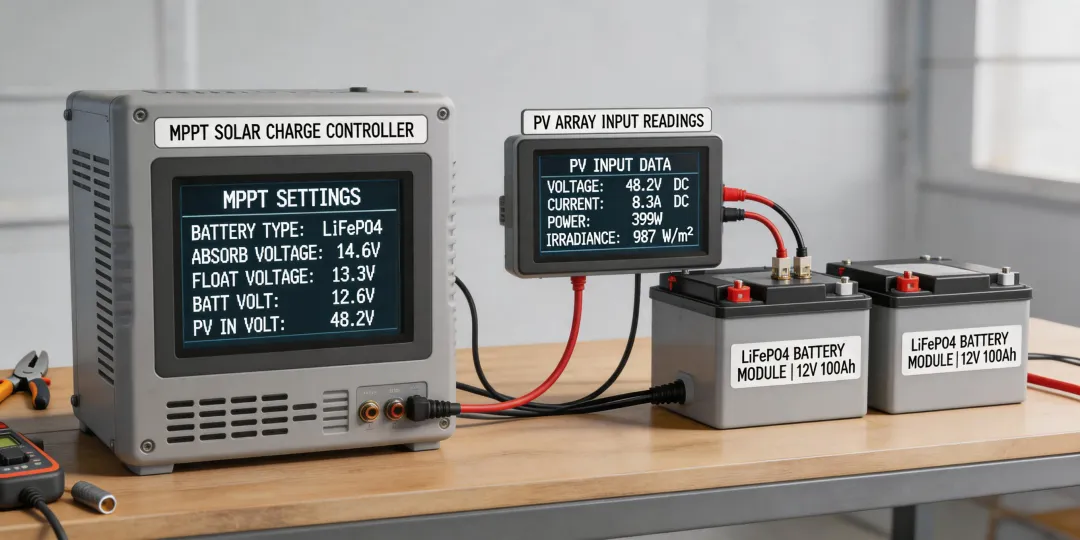
Here's what you need to know: A 12V LiFePO4 battery typically needs an absorption voltage of around 14.2V to 14.6V, and a float voltage of around 13.4V to 13.8V. For a 24V system, double those numbers (28.4V – 29.2V absorption). (Should mention: this varies by manufacturer—always check your specific cell datasheet.)
If you haven't configured these specific voltages in your EPEVER solar controller menu, you're gambling. And if you're using a standard user profile, you're probably already losing.
The Real Cost of Getting It Wrong
I want to be super clear about the consequences here, because I think a lot of installers underestimate them.
On that East Texas cabin project, we used a EPEVER 50A MPPT charge controller with a 4.8kWh LiFePO4 pack. I checked the wiring, checked the panels, everything looked great. The client called me three months later saying the system kept tripping offline. The battery voltage was reading 10.8V under a light load.
The culprit? The controller was float-charging the lithium cells at 13.8V for 12 hours a day. The BMS kept trying to balance, the cells kept getting mildly overcharged, and eventually, a couple of cells swelled just enough to trigger the BMS' protection. The battery was toast.
That error cost roughly $890 in replacement cells, plus a 1-week delay while we shipped new ones. The client was understanding, but I lost a referral deal from his neighbor. I can't put a dollar figure on that, but it stung.
So yeah, I'm a little passionate about this. I've seen it happen on systems using EPEVER solar controllers from the 20A model all the way up to the 100A units. The fix is always the same: get the voltage right.
Another Pitfall: The 50A Controller Capacity Myth
While we are on the subject of pitfalls, let me clear up another common misconception. The EPEVER 50A MPPT charge controller is a workhorse, but it is not a magic box. People assume that a 50A controller can charge any battery bank quickly. What they don't see is the limitation of the input side.
To actually get 50 amps out of it at 12V, you need a big wattage solar array. You need roughly 800W of solar to hit that 50A output at 14.4V. If you hook a 300W panel to a 50A controller, you will never see more than about 20A of charge current. The controller isn't broken; you just starved it. This is where a lot of folks get confused and blame the controller for slow charging.
I wish I had tracked the time I spent explaining this. What I can say anecdotally is that about 15% of the tech support calls I handle are exactly this—someone asking why their EPEVER 50A MPPT charge controller isn't putting out its rated current. They sized the controller right but the array wrong.
On a related note, I once ordered 12 units of a similar controller for a job, and I checked the specs myself. I approved the order, processed it. We caught the error when the electrician asked, "Hey, this controller is rated for 150V input, but we have 180V on the string." I'd misread the datasheet. $450 wasted on the wrong equipment, plus a 3-day production delay. Embarrassing.
Why 'It Just Works' Is a Lie (And How to Fix It)
So how do you prevent this? The 12-point checklist I created after my third mistake has saved us an estimated $8,000 in potential rework. 5 minutes of verification beats 5 days of correction. It's not exciting, but it works.
My Simple 3-Step Check for EPEVER + LiFePO4
- Set the Battery Type to 'User' or 'Lithium': Do not use the standard 'Sealed' or 'AGM' profiles. You need full control over the voltages.
- Configure Absorption and Float: For 12V LiFePO4, set absorption to 14.4V (or per your cell spec) and float to 13.6V. This ensures a full charge without holding the cells at a high voltage forever.
- Verify Equalization is OFF: This will kill a lithium battery fast. If your EPEVER controller has an equalization stage, disable it immediately.
That's it. That's the whole secret. It's not about buying a fancier controller; it's about taking 5 minutes to configure the one you have correctly.
I used to think that rushing through the initial setup was saving me time on a job. Now I know that the most expensive thing you can do is assume the default settings are good enough. They aren't. But once you get them right, the system is rock solid. I've had a setup running for three years now with zero battery issues, using an EPEVER solar controller and a custom LiFePO4 profile. It just works—but only because I stopped assuming it would.
Take it from someone who learned this the hard way: don't be the guy who has to explain a dead battery bank to a client. Spend those 5 minutes upfront.