-
Step 1: Find the single biggest starting load
-
Step 2: Size the LiFePO4 battery bank to the daily energy budget
-
Step 3: Size the charge controller after the battery, not before
-
Step 4: Check the voltage and compatibility path
-
Step 5: Add margin for the callback you don't want to make
- What Not To Do When Sizing Components
-
Bottom Line
Use this checklist when you're sizing the electrical core of an off-grid solar system. I'm a field service engineer for a renewable energy equipment distributor. In the last eight years I've helped design or troubleshoot around 200 off-grid installs, and about a third of them were rush jobs: a client's inverter died two days before a deadline, a custom controller had to be replaced for a weekend event, or somebody realized they forgot to include a 7 kW EV charger in the original load plan.
This is not a design manual. It is a field checklist for the decisions that actually cause callbacks when you get them wrong.
Here are the 5 sizing steps I go through, in order.
Step 1: Find the single biggest starting load
The question I hear most from integrators and self-builders is, 'What size power inverter do I need?' My answer is never 'add up your appliances.' Start with the single largest load that can switch on while the rest of the system is running. In my installs, that is usually a well pump, a fridge/AC compressor, or an EV charger.
A 7 kW EV charger, for example, represents a continuous load of around 29 A at 240 V. That is a lot. Inverter sizing at this level requires more than just a 7 kW continuous inverter, because the charger's internal electronics can have inrush behavior. In practice, I suggest an 8-10 kW inverter for a 7 kW off-grid EV charger, and I never claim it will start a 3 HP well pump on the same breaker.
Use the basic relationship: Watts = Volts × Amps. If a nameplate says 7 kW, treat it as 7,000 W continuous for inverter sizing. Then add surge headroom.
Step 2: Size the LiFePO4 battery bank to the daily energy budget
Once you know the load, calculate the battery bank. For a battery pack box LiFePO4 system, the math is straightforward:
Battery capacity (Ah) = daily load (Wh) ÷ (system voltage × depth of discharge × inverter efficiency)
For a 48 V system running 10,000 Wh/day through a 90% efficient inverter and allowing 90% DoD, that means:
10,000 ÷ (48 × 0.9 × 0.9) = approx. 257 Ah
That is the floor, not the recommendation. I use 25% extra for LiFePO4 because the BMS will disconnect under cold charging conditions and after extended loads.
One thing I learned the hard way: a battery pack box LiFePO4 with a cheap internal BMS can still support the discharge current, but if the BMS has a low charge current limit, your solar charging gets throttled. Check the BMS current ratings on both charge and discharge.
Step 3: Size the charge controller after the battery, not before
This is where EPEVER products show up in my projects more often than any other brand. If you're working with a 12 V battery, an epever mppt 30a solar charge controller is typically rated for around 390 W of PV input at 12 V. That makes it a good fit for a 300-350 W array with cold-weather margin. On a 24 V system, the same 30A controller can handle roughly 780 W of PV input. The epever mppt 20a is the smaller sibling: it suits a 12 V system with a 200-260 W panel, and it does not have much room to grow. If the client plans to add a panel later, I choose the 30A.
For a 48 V system, the same epever mppt 30a controller can handle a much larger array because output power equals 30 A × 48 V (about 1400-1600 W). That is why I ask clients for their battery voltage before I let them order a controller.
General MPPT sizing rule:
Treat the rated max PV input power as a hard ceiling, and use about 80% of it in cold climates. That protects you from days when panels overshoot their nameplate current.
The EPEVER controller's datasheet is the authoritative source for max PV voltage — ignore that, and you'll let the magic smoke out on a cold morning. If you're in North America, the National Electrical Code (NEC) Article 690 is the baseline for safe PV system wiring, not a substitute for that datasheet.
Step 4: Check the voltage and compatibility path
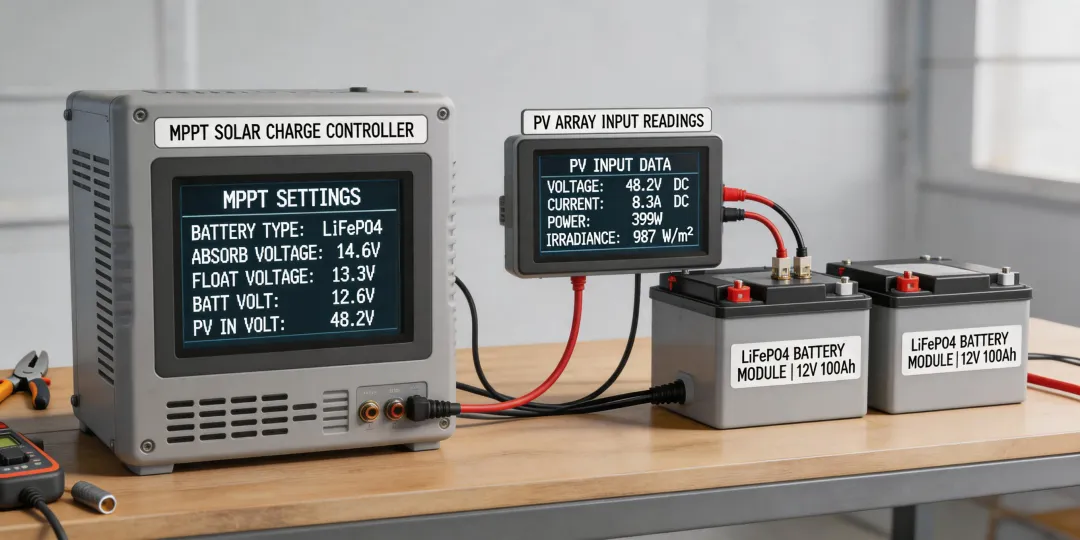
This sounds boring, but this is where my emergency calls come from. I said 'the controller supports lithium batteries' to a client once, and they heard 'I can leave the default battery type.' Result: the LiFePO4 battery was undercharged by about 15% for two months before anyone noticed.
Read the battery manufacturer's requirements, then set the charge controller's user settings or select the exact lithium profile. EPEVER controllers have flexible battery setup for this reason, but flexible does not mean automatic.
Also confirm every component is the same nominal voltage. A 24 V inverter on a 24 V battery bank does not automatically mean the charge controller is 24 V compatible. Check the PV input voltage range on the epever mppt 30a solar charge controller and make sure your panel wiring stays inside that range, especially on cold days when open-circuit voltage (Voc) goes up.
Step 5: Add margin for the callback you don't want to make
I spent my first two years trying to minimize cost. It took me about 70 site visits and two very angry clients to understand that a system that saves $150 on paper but fails at the worst moment is a brand problem, not a money problem.
When I specify a system, I use 1.25× for continuous loads and at least 2× for inductive loads like motors, pumps, and some refrigerators. The margin doesn't only protect your client. It protects your reputation. A client who sees their inverter trip twice in the first week won't remember that the load profile I used was a 'best case.' They will remember the brand on the side of the inverter, which is also your brand if you installed it.
In March 2024, I got a call 36 hours before a farm workshop opening. Another contractor had installed a 5 kW inverter for what turned out to be a 3 HP water pump with a starting surge above 11 kW. The pump ran once, tripped the inverter, and wouldn't restart. We changed the inverter to an 8 kW model and paid $320 in rush shipping. The client's alternative was missing the grand opening. That extra $320 is the reason I don't let 'minimum requirement' drive my designs.
What Not To Do When Sizing Components
Here are three mistakes I keep finding in rushed system designs:
1. Ignoring surge ratings
If the load is a motor, the continuous watts are not the problem. I once watched a client replace a 5 kW inverter with a 6 kW unit and still couldn't start the same pump. The pump's locked-rotor current was 4× its running current. Surge ratings exist for a reason.
2. Buying the charge controller before the battery bank
The same epever mppt 20a that is a fine choice for a 12 V, 200 W hobby panel can be undersized for a 12 V, 400 W array. The charge controller's output amps are the limit, not the panel watts alone. Match all three: array size, battery bank voltage, controller output current.
3. Putting an EV charger into a system without checking the rest
A 7 kW EV charger is essentially the largest load your inverter will see. If your off-grid system is barely sized for a house with a fridge and a laptop, adding a Level 2 EV charger means expanding the battery bank, charge controller, and inverter at the same time.
Bottom Line
So, what size power inverter do I need? The honest answer is: bigger than the math says, unless you include surge, efficiency, and future loads. Pair that with an adequately sized battery pack box LiFePO4 bank and a charge controller such as the epever mppt 30a or epever mppt 20a that actually fits your system voltage. The parts don't all need to be premium brands, but the sizing must be truthful.
The quality you ship is the quality your client perceives. That's not marketing talk. That's what keeps your phone from ringing on a Sunday night after the customer's EV charger trips their off-grid system for the third time.