-
Why This Checklist Works
-
The 6-Step Installation Checklist
-
Step 1: Calculate Your Real Load Before You Size Anything
-
Step 2: Choose the Right MPPT Charge Controller — Don't Underestimate the Tracer Series
-
Step 3: Configure the Battery Profile for LiFePO4 (This Is Where Most Mistakes Happen)
-
Step 4: Use the EPEver App to Verify and Monitor Everything
-
Step 5: Understand the Grid Connection Reality Before Choosing Backup
-
Step 6: Test Under Real Conditions (The Step 90% of DIYers Skip)
-
Step 1: Calculate Your Real Load Before You Size Anything
-
Final Reminders and Common Mistakes
If you're planning a complete solar kit for a shed, upgrading to a LiFePO4 battery bank, or weighing a backup home battery vs generator, this checklist is for you. I've been installing off-grid EPEver systems for seven years, and I've personally made (and documented) four significant mistakes that cost me around $1,300 in wasted parts and labor. Now I run every new install against this six-step list so I don't repeat those errors—and you don't have to either.
Why This Checklist Works
These are the checks I use every time, in order. They're not theoretical. Each one is a lesson from a real failure—a controller that fried, a battery bank that undercharged, a customer who called at midnight because the backup system didn't kick in. The steps are practical and specific enough to follow on a Saturday afternoon.
The 6-Step Installation Checklist
Step 1: Calculate Your Real Load Before You Size Anything
Most people start by picking a solar panel or a charge controller. I did that in 2018 and ended up with a system that couldn't run a 12V fridge for more than six hours. It's tempting to think you can just add another panel later. But if you undersize the battery and controller from the start, you'll be replacing those, not just adding a panel.
- List every device you'll power (lights, phone chargers, a router, maybe a small inverter).
- Multiply each device's wattage by hours you'll use it per day. Add 20% for inefficiency and cloudy days.
- If your total is above 1,000 Wh per day, plan for at least 200W of solar and a 30A, 12V MPPT controller.
Checkpoint: Commit to your load list in writing before you buy anything.
Step 2: Choose the Right MPPT Charge Controller — Don't Underestimate the Tracer Series
The EPEver Tracer MPPT solar charge controller is the heart of most of my builds. But 'MPPT' doesn't mean magic. The controller's input voltage and current rating must match your solar array. I once paired a 20A Tracer with a 400W array on a 12V battery. On paper, 400W / 12V = 33A, so the controller was maxed out. In winter, when the battery was low, it would overheat and derate. Looking back, I should have bought the 40A version. At the time, the $40 savings seemed worth it. It wasn't.
- Check the Voc (open-circuit voltage) of your solar panels and make sure it's below the Tracer's max input voltage (usually 100V for the Tracer AN series, per the official datasheet).
- Match the controller's nominal battery voltage (12/24/36/48V) to your battery bank.
- Don't forget temperature compensation if your batteries are lead-acid (LiFePO4 typically doesn't need it).
If budget is a concern, the price difference between a 20A and 40A Tracer is often only $30-50, which is far less than replacing a controller later (based on typical public online listings, January 2025).
Step 3: Configure the Battery Profile for LiFePO4 (This Is Where Most Mistakes Happen)
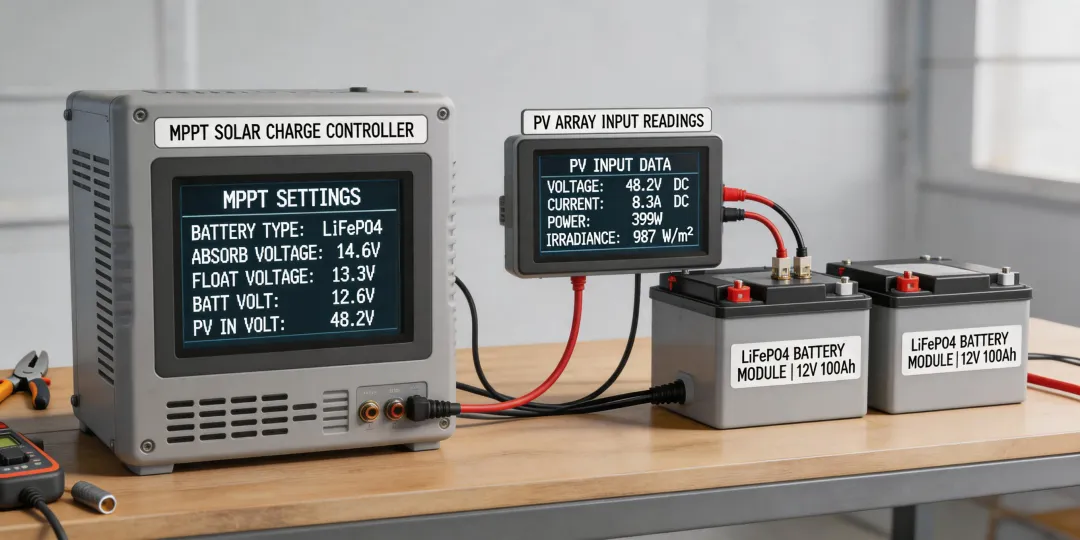
A common misconception is that any 'lithium' setting works for any lithium battery. It's tempting to just pick the first lithium choice in the menu. But each LiFePO4 battery has its own voltage requirements. If the absorption voltage is set too low, you'll never fully charge the battery. If it's too high, the BMS disconnects and your controller shows a weird overvoltage fault.
The most frustrating part of this is the silent failure: you assume the battery is charging, but it's actually sitting at 80% state of charge. You'd think the BMS would send a signal, but with many budget batteries, it just stops charging. What finally helped was using the EPEver app to monitor the battery trend over a week.
- Set the battery type to 'User' in the Tracer, not the pre-set lithium value, unless you've verified it matches your battery datasheet.
- Enter the exact absorption, float, and low-voltage disconnect values from your battery manufacturer.
- If you're using a BMS with a voltage ceiling of 3.65V per cell, set the absorption to 14.2V for a 12V battery (not 14.6V unless specified).
Step 4: Use the EPEver App to Verify and Monitor Everything
If you're not using the EPEver app, you're flying blind. Yes, the LCD screen is fine, but no one wants to stand in a dusty crawlspace reading it. The app gives you history, fault logs, and lets you change settings from your phone. I only started using it in 2021 after a customer's system kept tripping on low voltage. Without the app, I never would have seen the correlation between their morning coffee usage and the battery voltage dip.
- Download the EPEver solar app (iOS/Android are both available as of January 2025).
- Connect via Bluetooth or using the RS485 to USB adapter for a more stable link.
- Update the controller's firmware if a new version is available (the app scans for it).
Checkpoint: Confirm that all settings you entered in Step 3 still match after a firmware update. (Updates rarely reset them, but it has happened to me once.)
Step 5: Understand the Grid Connection Reality Before Choosing Backup
The debate of backup home battery vs generator is usually framed as a simple price comparison. But a generator is not just the purchase price—you store fuel, change oil, and pray it starts when you need it. A battery system is like having a power plant that doesn't need breakfast.
For systems that interact with the grid—whether it's a battery energy storage system grid design or a simple AC transfer switch—you need to decide how and when the backup kicks in. In an emergency, paying for an automatic transfer switch is worth every penny. I've seen a customer miss 6 hours of critical work because they had to manually plug in their generator. A manual switch can work, but if a deadline is on the line, the certainty of an automatic system has a premium for a reason.
- Decide if you need grid-tie, off-grid, or hybrid. These require different components and configurations.
- For a battery backup, ensure the inverter can start real-world loads (see Step 6).
- If you go with a generator, budget for annual maintenance and a weekly test run.
In my experience, most homeowners who buy a generator for 'just in case' run it less than once a year—and then it doesn't start. Meanwhile, the EPEver battery setup I installed at a hunting cabin automatically wakes up every time the grid goes down, no user input needed.
Step 6: Test Under Real Conditions (The Step 90% of DIYers Skip)
My first system worked perfectly in the garage, then failed in the field. I never tested it with a full load and a low battery. The Tracer MPPT may be fine, but your wiring, battery termination, or inverter's startup surge could kill the system. In November 2024, a simple loose battery terminal caused a 0.5V voltage drop, making the inverter shutdown every time a fridge compressor kicked in.
- Run every load you plan to power for 24–48 hours.
- Monitor the battery voltage under load using the EPEver app; look for drops that seem too steep.
- If you have a backup system, simulate a grid outage and verify the transfer happens within your expected time.
Checkpoint: Walk away. Let the system run on its own for 48 hours. Then come back and check the logs. Any issue will show up in the app's history.
Final Reminders and Common Mistakes
Before you start, remember a few things I learned the hard way:
- Don't buy the cheapest no-name charge controller just because it looks similar. The EPEver Tracer's setting granularity and battery protections are worth the extra money, especially with LiFePO4.
- Never skip torque-checking battery terminals. A loose connection can melt a battery post or cause a fire.
- When you're on a deadline, pay for faster shipping. I once saved $20 on ground shipping and waited three extra days for a part. The delay cost me a full weekend of labor. (That's the 'time certainty' premium—sometimes it's the smartest purchase you can make.)
- Don't trust generic battery settings until you've verified them with your battery vendor.
If you take one thing from this checklist, it's to test more than you think you need to. There's no substitute for seeing a system run on its own, with real loads, for a full day. That's how you catch what the spec sheets don't tell you.
I'm not going to tell you EPEver is flawless—no brand is. But after seven years of installs, the Tracer series has been the most forgiving and adjustable controller I've used. Set it up right, and it should last.