-
Who This Checklist Is For
-
Step 1: Match the Controller to the Solar Array—Not the Battery
-
Step 2: Verify Battery Settings—Especially for LiFePO4
-
Step 3: Calculate the Real Cost of Setup & Programming
-
Step 4: Check the Fine Print on Warranty & Return Policy
-
Step 5: Consider Future Expandability
-
Common Mistakes & Final Notes
Who This Checklist Is For
If you're an installer, system integrator, or distributor sourcing MPPT solar charge controllers for off-grid applications, this is for you. You've got a project—maybe a remote cabin, an overland vehicle, or a small off-grid solar kit—and you need to pick a controller that won't fail, won't break your budget, and won't come back to haunt you.
This isn't a deep dive into MPPT vs. PWM theory. It's a 5-step checklist I use when I'm evaluating controllers for our quarterly orders. I've been a procurement manager for a solar equipment distributor for 6 years, managing about $180,000 in annual spending on charge controllers and inverters. Over that time, I've quoted, tested, and rejected more than a few models. The following is what I've learned about avoiding the hidden costs.
Step 1: Match the Controller to the Solar Array—Not the Battery
This is the most common mistake I see. People pick a controller based on battery voltage. They have a 12V battery, so they buy a 12V controller. That's not wrong on the surface, but the price of that misstep shows up later.
What you want to do is match the controller's PV input voltage and current rating to the solar panels. Look at the Voc (open-circuit voltage) of your panels in cold weather—that's when voltage peaks. If your panels produce 150Voc in winter, and you buy a controller rated for 100V max input, you've bought a ticking time bomb. The controller will either shut down or fry. And when it does, you're not just replacing the controller. You're losing system uptime, paying for a service call, and possibly damaging the battery.
What I do: I always check the controller's datasheet for the maximum PV input voltage and the maximum PV input power for the system voltage. For a 12V system with a 40A controller, that's roughly 520W of solar. For a 50A controller at 12V, about 650W. If your array is bigger, you need a higher-rated controller or a higher system voltage.
Checkpoint: Before you buy, divide your array's total wattage by your system voltage. Is the result less than the controller's rated current? If yes, you're in the ballpark. If not, go up a size.
Step 2: Verify Battery Settings—Especially for LiFePO4
Honestly, this is where a lot of budget controllers fall apart. They have a few presets for flooded lead-acid and maybe AGM, but they treat LiFePO4 as an afterthought. And once you're committed to using their default settings, you can't change them.
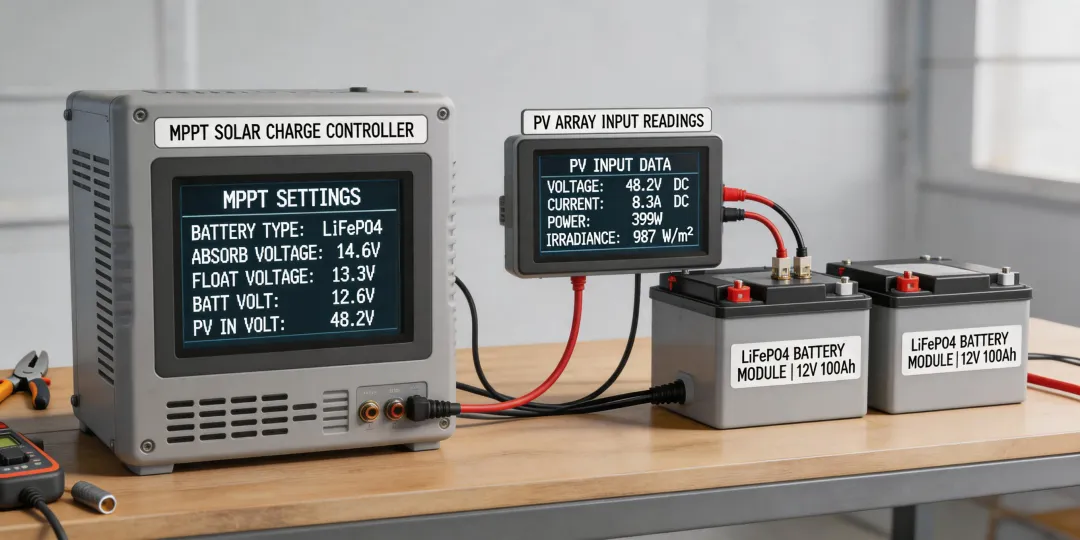
What most people don't realize is that the controller's default absorption voltage for lead-acid (around 14.4V-14.8V for a 12V system) is too high for LiFePO4. Most LiFePO4 batteries need a bulk/absorption voltage of about 14.2V-14.6V, and a float voltage of 13.4V-13.8V. If you try to force 14.8V into a LiFePO4 cell, the BMS will disconnect it for protection. Then the controller sees an open circuit, assumes the battery is full or disconnected, and stops charging. You end up with a dead battery come evening.
The checklist item: Confirm the controller has user-adjustable settings for at least these parameters: absorption voltage, float voltage, and low-voltage disconnect. If it only has 'Lithium' mode as a single option without sub-adjustments, you're taking a risk. I've had to swap out controllers on two projects because the 'Lithium' presets were incompatible with the specific battery brand the client bought.
Checkpoint: Can you set the absorption voltage to X.X volts? If it's locked, cross this controller off your list for LiFePO4 projects.
Step 3: Calculate the Real Cost of Setup & Programming
Here's something vendors won't tell you: the base price of the controller rarely includes the time it takes to set it up properly. A controller that costs $150 but requires a laptop, software download, and a custom cable to change one setting will cost you more in labor than a $200 controller with an intuitive LCD interface and buttons.
The surprise wasn't the price difference between the 'cheap' and 'mid-range' controllers. It was how much hidden value came with the easier-to-program option. Over our 6 years of tracking, we found that controllers with on-device programming saved our installation teams an average of 20 minutes per unit. If you're installing 25 units a quarter, that's 500 minutes—over 8 hours of labor saved. At typical labor rates, that's a $400-600 savings per quarter.
My rule: For any new controller we quote, I add a 'programming time' estimate. If I can't set it up without a computer in less than 5 minutes, I know it'll cost us in the long run.
Checkpoint: Does the controller have an on-board display? Can you change the absorption voltage without connecting to a PC?
Step 4: Check the Fine Print on Warranty & Return Policy
I wish I'd known this earlier. When you buy a controller from a brand with a 1-year warranty, you're effectively renting it. For a device that lives in a harsh environment—temperature extremes, voltage spikes, vibration in a mobile installation—1 year is nothing. A controller that fails in month 14 will cost you the full replacement price, plus the labor to swap it out, and potentially the lost revenue from a dead system.
The most frustrating part of my job is processing RMA for a controller that failed just outside its warranty period. You'd think a defect would be covered, but if the warranty is 12 months and it failed at month 13, you're out of luck. I've seen 5-year warranties on some professional-grade units, which tells me the manufacturer is confident in their build quality. The difference in upfront price is often $30-$50, but the risk reduction is huge.
What I check: Warranty length (2+ years is a green flag), whether the warranty covers labor, and whether the return process requires you to ship the unit back first (leaving you without a controller for weeks).
Checkpoint: What's the warranty period? Does it require advance replacement or not?
Step 5: Consider Future Expandability
What was best practice in 2020 may not apply in 2025. The fundamentals of MPPT charging haven't changed, but the execution has transformed. Today, many controllers include Bluetooth monitoring, data logging, and firmware updates. These features aren't just nice-to-haves—they'll help you troubleshoot remotely and avoid a site visit.
Also, consider parallel operation. If your client might expand their array next year, can you connect two of these controllers in parallel to handle the added current? Not all controllers support this. If you buy a single 40A controller now and the system needs 60A later, you'll have to replace the controller entirely instead of just adding a second one.
Checkpoint: Does the controller support parallel operation? Does it have a monitoring interface (Bluetooth or RS485)?
Common Mistakes & Final Notes
I've made every mistake on this list at least once. The worst one was buying a controller that didn't have a low-voltage disconnect threshold adjustable for LiFePO4. The BMS kept kicking in, and the batteries never charged properly. It was a $1,200 redo—had to buy a compatible controller and pay for a site visit.
A few quick warnings:
- Don't trust 'max input voltage' specs on product listing pages without checking the datasheet. Some budget controllers inflate this number. Derate by at least 20% for cold climates.
- Don't assume a '50A' controller can handle 50A continuously at 40°C. Check the temperature derating curve. Some units need a fan or are limited to 30A at high temps.
- Don't ignore the cost of the monitoring accessories. If you need Bluetooth, does it come integrated, or is it a $30 add-on? That's part of the TCO.
This checklist isn't exhaustive, but it'll catch 90% of the costly mistakes I've seen and experienced. Print it out, put it on your desk, and use it before you place your next order.