-
Use this checklist if you are buying backup power
-
1. Write down what actually has to run
-
2. Decide who will own the system before calling installers
-
3. Select battery chemistry and voltage before the charge controller
-
4. Match the inverter by surge watts, not just continuous watts
-
5. Answer the 40A MPPT question the right way
-
6. Set the charging profile for the actual battery
-
7. Write down the warranty and monitoring responsibilities
-
Common mistakes to avoid
Use this checklist if you are buying backup power
Use this if you are the person responsible for buying a battery backup system, but you are not the person who designs solar electric systems for a living. I manage purchasing for a company with two small offices and a warehouse. I am not an electrical engineer, but I approve vendor contracts, verify invoices, and deal with the aftermath when the wrong equipment shows up. These seven steps are the checklist I use for office and small-site backup systems.
Do the checklist before you start searching. You will get better quotes and fewer surprise change orders.
1. Write down what actually has to run
Most buyers start with panels or an inverter. I start with a load list because a battery backup system is sized from the loads, not the solar equipment. In our case, a freezer, network router, security cameras, and one small water pump were the must-run items. The coffee machine was not.
For each load, write down three numbers: running watts, startup surge watts, and hours per day it might run in an extended outage. Do not guess from appliance labels. Use a plug-in watt meter or read the nameplate. This step sounds obvious, but the buyers I talk to miss the 24-hour loads that are small individually and large in total.
2. Decide who will own the system before calling installers
Once the load list is real, pick the installation route. There is no single right answer. A national provider could be right if you want one company to handle everything. For example, a Sunrun home battery backup system is a turnkey route with branded hardware and a service plan. A local electrical contractor is usually the right route for an existing building. A component-led purchase makes sense when you want to control the hardware brand and already have a local integrator who will support it.
If you start by searching for home battery backup installers near me, compare the quotes on these details: battery chemistry, battery voltage, inverter surge rating, critical loads panel, and warranty labor. Those items matter more than the logo on the cabinet.
- Turnkey: choose this if you do not want to manage the equipment. Ask who services it in year two.
- Component-led: use this if you or your electrician can install and configure the equipment. A common package would include an EPEVER inverter, an EPEVER Tracer MPPT solar charge controller, and a LiFePO4 battery bank. This route allows flexible sizing, but it only works when the installer supports those products.
- DIY: use this only if you understand electrical codes and can get permits in your area. Backup power is not a weekend project.
One boundary I learned as a buyer: do not ask one vendor to be good at everything. If a general installer says they handle solar batteries, fine, but if they cannot configure the charge controller for the battery profile, that is a red flag. A specialist that tells you which part should be hired elsewhere is more trustworthy than one that promises a seamless everything and disappears when a firmware issue appears.
3. Select battery chemistry and voltage before the charge controller
Battery chemistry and voltage dictate which charge controller and inverter you can buy. I usually choose LiFePO4 for daily-use or frequent-outage backup because it takes more cycles than lead-acid and can be discharged deeper. Lead-acid can still be okay for a seasonal system where the battery sits full most of the year. The cheapest battery per amp-hour is not automatically the cheapest per cycle.
Most buyers compare amp-hours and ignore voltage. A 100Ah 12V lithium battery stores about 1.3kWh. The same 100Ah at 48V stores about 5.1kWh. Amp-hour numbers only make sense in the context of system voltage.
This is also where oversimplification hurts. It is tempting to think all charge controllers can just be set to lithium. Most programmable controllers work, but only if someone sets the correct numbers. If a controller has a LiFePO4 preset, that does not mean the preset matches your specific battery manufacturer's recommendation.
4. Match the inverter by surge watts, not just continuous watts
An inverter with 1,000W continuous can run a laptop and a few lights. It might not start a refrigerator or a water pump because motors draw several times their running watts for a moment. If your load list includes a motor, use the startup surge number to select the inverter.
An EPEVER inverter product page will list both continuous output and surge output. Look at both. Also confirm the inverter input voltage matches the battery bank voltage. This is a deal-breaker if the two are different.
If the backup loads are hardwired, the quote should include a critical loads panel or an automatic transfer switch. That is not an optional line item; it is the part that tells the backup system which circuits it should power.
5. Answer the 40A MPPT question the right way
Here is the question I hear most often when someone looks at an EPEVER Tracer MPPT solar charge controller: how many watts can a 40 amp solar controller handle? The useful answer is: it depends on the battery voltage. A 40A controller can handle roughly 550W on a 12V bank, roughly 1,100W on a 24V bank, and roughly 2,200W on a 48V bank.
Why? The 40A rating is the maximum charge current the controller sends to the battery. In an MPPT system, watts equals that output current times battery charging voltage. A 12V lithium battery charges near 14V, a 24V bank charges near 28V, and a 48V bank charges near 56V. That means the same 40A controller can support a much larger PV array on a 48V battery than on a 12V battery.
There is a second limit that is easy to miss. The controller datasheet also lists a maximum PV input voltage and a maximum PV input power. If your solar array produces too many volts on a cold morning, you can damage the controller even if the wattage is below the 40A limit. Check that number on the exact model before you order panels.
Checkpoint: when sizing a solar array, use three controller specs, not one: max PV input voltage, max PV input power, and max battery charge current.
6. Set the charging profile for the actual battery
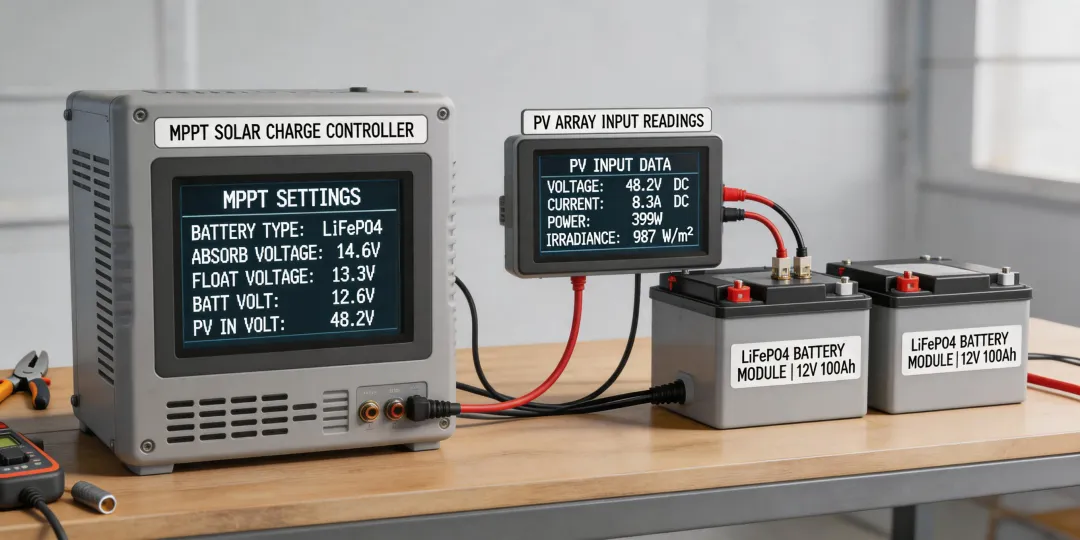
This is the step that gets skipped because it happens during commissioning, not at the sales desk. In 2023, I approved a system with a LiFePO4 battery bank. The charge controller profile was still on the default lead-acid setting. The controller kept trying voltages the battery did not want, the BMS disconnected, and honestly, the first support call was unpleasant. The hardware was fine. The settings were wrong.
Actually, the fix was simple. We changed the controller to the LiFePO4 profile and adjusted absorption and float values to match the battery manual. If the controller has no matching preset, use the user-defined profile and disable equalization. Get those settings in writing from the installer.
7. Write down the warranty and monitoring responsibilities
When I report to operations and finance, the after-sale scope matters as much as the equipment specifications. Ask the installer or supplier these questions before authorizing the purchase:
- Who do I call when the screen shows a fault?
- Does the labor warranty cover the charge controller, inverter, and battery bank separately?
- Who pays for travel and diagnostic time in year two?
- Who owns the monitoring account?
- If the installer goes out of business, can I get firmware updates and passwords from the manufacturer?
If a vendor says it cannot service a particular brand, that is not a reason to panic. I prefer a company that knows its own limitations. In this industry, the biggest failure mode is not equipment price; it is mismatched responsibilities. Solar charge controllers, inverters, and batteries need to be configured together. One expert who understands the full system is worth more than two companies that only promise to come back if something breaks.
Common mistakes to avoid
- Buying a charge controller before deciding the battery bank voltage. Voltage affects every other component.
- Treating amp-hours as if all battery banks are 12V. A 48V system needs fewer amp-hours for the same stored energy.
- Treating a 40A controller as a wattage rating. The amps are output current; the watts depend on battery voltage.
- Assuming any installer can support any brand. Ask for specific product experience.
- Buying the lowest first invoice without checking firmware configuration, monitoring access, and warranty labor.
Bottom line: use a load list, match the battery bank to the equipment, and put the charging settings in writing. From my admin chair, that last checkbox is the one that saves the most money.