-
The checklist
-
1. Verify the EPEver 40A MPPT solar charge controller specs against system voltage
-
2. Confirm the CATL LiFePO4 battery's low-temperature charging behavior
-
3. Choose a power inverter for pickup truck use by real loads, not available space
-
4. Put the battery BMS on the order, not just the CATL LiFePO4 label
-
5. Answer what is a Level 3 EV charger before you include it in a quote
-
6. Bench test the complete system before it goes to the field
-
1. Verify the EPEver 40A MPPT solar charge controller specs against system voltage
-
The most expensive component is the service call
Use this checklist if you're the person who places purchase orders for a mobile solar power kit: a charge controller, a battery, and a power inverter for pickup truck installs. I'm the buyer for a 68-person clean-energy contractor. I handle roughly 180 orders per year across nine vendors, and I report to operations and finance. I don't design every system. My job is to make sure the parts work together before they leave the shop.
This list is for an EPEver 40A MPPT solar charge controller and a CATL LiFePO4 battery package. It has six steps, and it won't replace a real electrical design. It will catch the mismatches that turn into service calls.
The checklist
1. Verify the EPEver 40A MPPT solar charge controller specs against system voltage
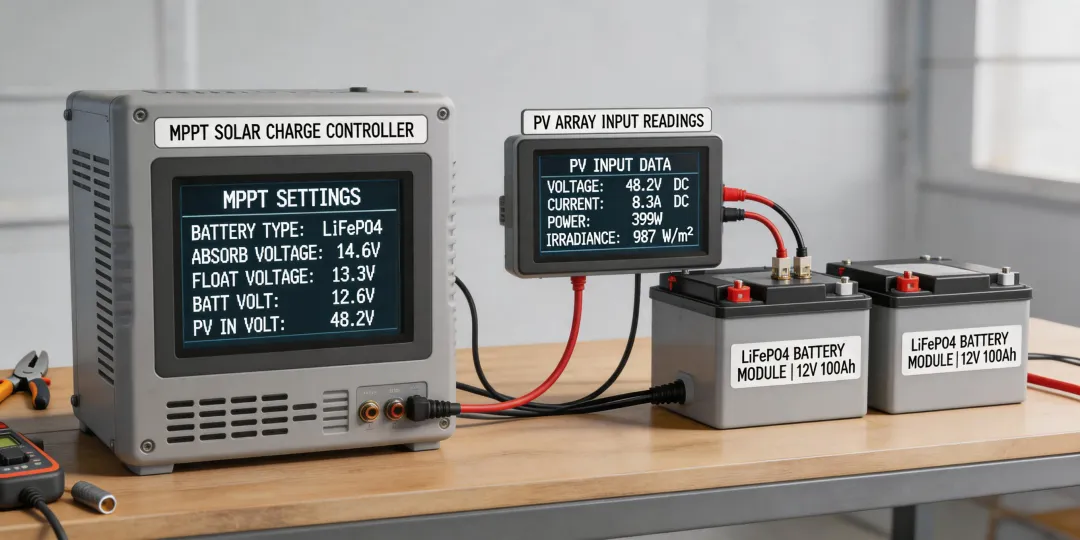
Start with the EPEver MPPT 40A manual, not the shopping page. The 40A in the product name is the maximum battery charging current. It is not the max solar array current, and it is not a power rating.
A 40A controller on a 12V battery bank can put roughly 520W to 580W into the battery. On a 24V bank, the same controller can deliver over 1,000W. If you order a 1,500W panel array for a 12V system, a 40A controller will sit at 40A and leave charging power on the table. The customer sees a slower charge than the panel rating implied.
I had to learn this during a 2022 parts standardization project. Since then, I pull the manual before I recommend any controller model. The manual also lists the max PV open-circuit voltage, which gets more important in cold climates because panel voltage rises as temperature drops. As of January 2025, that is the document I still go by before ordering.
2. Confirm the CATL LiFePO4 battery's low-temperature charging behavior
CATL cells are solid, but the phrase CATL LiFePO4 battery is not a full specification. The BMS in the final battery pack decides how it behaves in a real truck.
Most LiFePO4 cells should not be charged below 0°C. A sunny winter day is exactly the situation where a controller sees good PV voltage and tries to charge a cold battery. If the BMS does not disconnect charging, the pack can be damaged quietly.
Ask the battery vendor one question: does the BMS open the charge path below freezing? If the answer is vague, ask for the BMS settings screen or the datasheet. A vendor who cannot answer that question hasn't thought about winter installations.
3. Choose a power inverter for pickup truck use by real loads, not available space
The phrase power inverter for pickup truck covers a lot of different units. Some are 150W plug-in adapters. Some are 3,000W hardwired units. The inverter is not the place to save money on a commercial install.
Write down the loads that may run at the same time. A laptop charger is not the issue. A small air compressor can be. Its running load might be 1,200W, while its startup surge is over 2,000W. If the inverter is too small, the motor stalls or the inverter shuts down under load.
I recommend pure-sine inverters for these truck kits. Many tool chargers are fine with modified sine, but I do not want to explain why a $1,200 battery charger failed because of a $60 inverter. The difference shows up as confidence in the finished product.
Then check the cable and fuse size. A 2,000W inverter at 12V can draw around 200A. That normally means 2/0 copper cable for a long run, plus a fuse close to the battery. I have seen installers choose a smaller wire because it looked big enough. It wasn't, and the customer thought the inverter was bad.
4. Put the battery BMS on the order, not just the CATL LiFePO4 label
During our 2024 fleet power project, two battery vendors quoted the same nominal 12V 100Ah battery with CATL cells. One BMS was rated for 80A continuous. The other was rated for 160A.
That difference changes which inverter you can use. A 2,000W/12V inverter can pull somewhere around 160A to 200A. An 80A BMS will shut down at that load. The battery and inverter are both fine separately; together they fail. The installer won't see the BMS rating, and the end user won't care. They will remember that the equipment stopped working.
When you build the purchase spec, list the continuous discharge current of the BMS, the low-temperature cutoff range, and the terminal type. Add CATL cells as a quality indicator, not as the only requirement.
5. Answer what is a Level 3 EV charger before you include it in a quote
At least once during every larger sourcing project, someone asks whether the solar kit can include a Level 3 EV charger. The answer starts with a clear definition.
What is a Level 3 EV charger? In common usage, it is a DC fast charger. It sends 50kW to 350kW directly to the EV battery and needs a serious electrical feed. Level 1 and Level 2 chargers supply AC power at 120V or 240V, and the vehicle's onboard charger handles the conversion. Level 3 is a different class of equipment.
If a customer asks for Level 3 on a pickup truck power system, treat it as a signal to stop and clarify. A Level 3 DC fast charger is grid-connected infrastructure with its own permitting, utility coordination, and electrical engineering. It is not a solar accessory. I would not quote one off the back of a mobile inverter system.
The same word is also used loosely across the industry. Some call any large DC charger Level 3 even though the equipment from 50kW to 350kW is very different. That is another reason not to guess from the label.
6. Bench test the complete system before it goes to the field
This is the step that gets cut first when a deadline slips. Do not skip it.
Connect the battery to the EPEver controller first, then connect the solar input. If you need to open the circuit, remove the solar input before disconnecting the battery. Verify that the controller voltage reading matches a multimeter. Then run the inverter under load for at least ten minutes.
Check the cable temperature with your hand after the test. Loose terminals create heat. Tighten, retest, and take a photo of the final settings page. That photo is useful later when a technician has to troubleshoot a system.
The free EPEver manual and the controller's own history data also help after an install. Spend a few extra minutes on the bench now, and you avoid an hour in a truck bed in the rain later.
The most expensive component is the service call
I'm an administrator, not an electrical engineer. I don't write permits or calculate wire ampacity for code, and this article is not an engineering spec. What I can tell you from a purchasing perspective is simple: the quality gap between a proven controller and a low-cost clone usually shows up as one service call, and one service call can erase the savings on a whole order.
When I signed off on our 2024 order, I second-guessed the higher upfront cost of the EPEver controllers. The spreadsheets said cheaper controllers would pass the same spec. My gut said the difference would show up in settings menus and support calls. In the end, the install report from the first truck was clean, and no one asked me how to reset a controller. That is the kind of customer experience you want to buy.
Run every kit through this checklist before you place the order. The box that arrives is only as good as the decisions made before it arrives.