-
Step 1: List every load first, including a 32 amp level 2 charger you haven't bought yet
-
Step 2: Choose the battery voltage before sizing charge controller output
-
Step 3: EPEVER charge controller lithium settings need to be set before commissioning, not after
-
Step 4: What is an off-grid inverter, and why is it not the same as a charge controller?
-
Step 5: The EPEVER 40A MPPT solar charge controller manual is part of the purchase
-
Step 6: Verify at receiving, then power up in the right order
-
Common mistakes that cost us time
Full disclosure before we get into the weeds: I'm an office administrator, not an electrical engineer. For the last few years I've handled purchasing for a field-services company with roughly 200 employees and three regional depots. When we decided in 2024 to pull the portable generators out of two remote depots and run them on off-grid solar, the job of buying the EPEVER equipment landed on my desk. This article is the checklist I wish someone had handed me.
There's plenty of technical content written for installers. If you're the person who has to approve the purchase order, verify part numbers, and make sure site techs don't program the controller wrong, that content can feel like it's written in a different language. This is written in my language: practical, careful, and a little suspicious of anything that sounds too good.
At least, this is what worked for our situation, which was two small communications depots with moderate loads. If you're sizing for a workshop with heavy machinery, the same steps apply, but your numbers will be very different.
Step 1: List every load first, including a 32 amp level 2 charger you haven't bought yet
I started by asking our site supervisors to list everything that would be plugged in and for how many hours each day. Not just the obvious things like lights and radios, but the small stuff: camera power supplies, network switches, a router, a trickle charger for a vehicle battery. It's easy to forget the 15-watt loads, and they add up fast.
Write each load in watts, multiply by the number of hours you expect it to run, and add it up. That total in watt-hours tells you the battery bank size, which then drives almost every other decision.
Now comes the part I almost skipped: future loads. If there is any chance the site will get an electric vehicle charger later, list it now even if it isn't in this year's budget. A 32 amp level 2 charger draws roughly 7.7 kilowatts at 240V AC. Why does that matter? Because 7,700 watts is more than the entire electrical load of a small depot. A single 32 amp level 2 charger can be the difference between a 5 kWh battery bank and a 30 kWh bank. We decided to design one depot's electrical room with enough space and breaker capacity for a future charger, but we did not try to power it from the initial off-grid system.
Step 2: Choose the battery voltage before sizing charge controller output
The phrase “sizing charge controller” sounds like it depends on how many solar panels you have. In practice, it depends on the battery bank voltage just as much.
The basic formula I used was simple:
Charge controller output current = solar array wattage ÷ nominal battery voltage
Example: a 1,200W solar array feeding a 24V battery bank can produce about 50A. That means a 40A controller is undersized. The same 1,200W array feeding a 48V bank produces only 25A, so a 30A controller would have plenty of margin.
Our vendor's application engineer also pointed out that charging is treated as a continuous load in the U.S. National Electrical Code, which is why most designers add a 25% safety margin on top of the calculated current. When someone tells you “40A is 40A,” hand them the EPEVER 40A MPPT solar charge controller manual. The current rating is the charging current on the battery side. The unit also has a maximum PV input voltage and a maximum PV input wattage, and those numbers are not optional.
For our first depot, I was one click away from ordering three high-voltage panels wired in series that would have exceeded the controller's input voltage limit on a cold morning. I only caught it because a tech mentioned that solar panel voltage rises when panels are cold. Dodged a bullet there, and it taught me to check the input voltage spec before checking the price.
Step 3: EPEVER charge controller lithium settings need to be set before commissioning, not after
This one cost us some head scratching. Actually, let me rephrase: it almost cost us a battery warranty. If your battery bank is lithium iron phosphate, also sold as LiFePO4, the default lead-acid profile on a charge controller is not good enough.
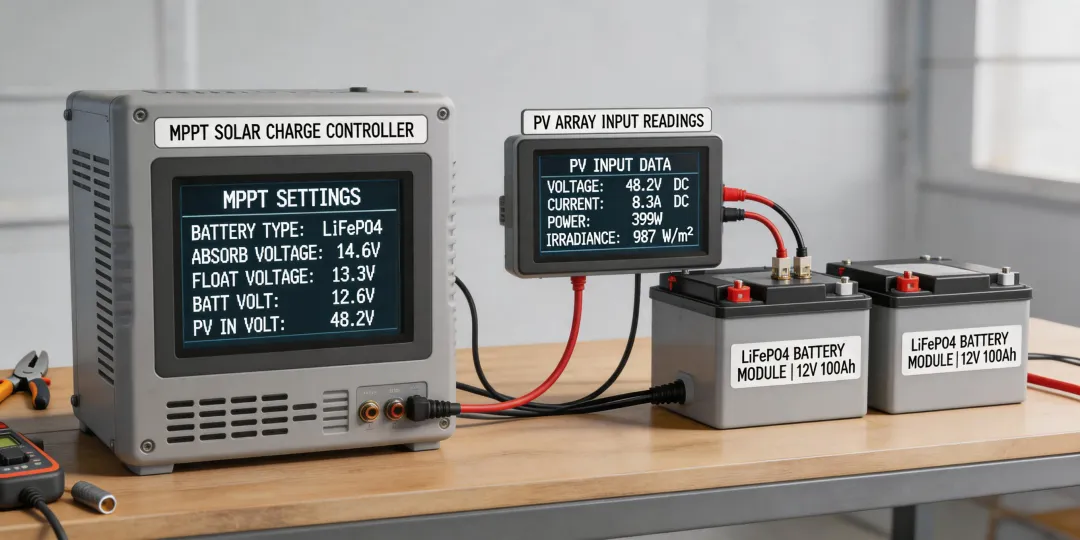
A 12V LiFePO4 battery typically wants an absorption voltage somewhere around 14.2 to 14.6V and a float voltage around 13.6 to 13.8V, depending on the manufacturer. Some battery makers even recommend no float voltage at all. The exact numbers come from the battery datasheet, not from a forum post. When I searched for “epever charge controller lithium settings,” I found a lot of confidently wrong advice. The manual plus the battery manufacturer's spec sheet is the only combination I trust now.
What I appreciate about the EPEVER controllers we used is that they offer a user-defined battery profile, which means you can enter the absorption and float voltages that match your specific battery. If absorption voltage is set too high, the battery management system will disconnect the battery to protect it, and then the controller behaves as if the battery suddenly vanished. That can cause confusing voltage readings and a very frustrated site tech.
Set the battery type and voltages on the bench before the solar panels are connected. It takes two minutes with the front panel and it prevents a lot of late-night troubleshooting.
Step 4: What is an off-grid inverter, and why is it not the same as a charge controller?
After five years of managing purchase orders, I've learned to translate engineering jargon for the finance team. When a colleague asked me “what is off grid inverter used for here?” the simplest answer I could give was this: the charge controller manages energy coming from the solar panels into the battery bank, and the inverter takes DC energy out of the battery bank and converts it into AC power for normal appliances.
Both boxes sit in the same system, but they do different jobs. A solar charge controller does not power your AC loads by itself, and an inverter does not control how the battery gets charged from solar. You usually need both in an off-grid solar system.
When selecting an off-grid inverter, the important procurement checks are:
- It matches the battery bank voltage. A 48V inverter on a 24V battery bank is a non-starter.
- It can handle the surge from motors and compressors, not just the running wattage.
- It provides a pure sine wave if any loads are sensitive or if the site has induction motors.
- It has enough continuous output for the load list from Step 1.
In our case, the inverter choice actually changed the battery bank voltage. Once we chose a 48V inverter for the larger depot, the charge controller sizing became simpler and the wiring got smaller. That is the order that makes sense: loads first, then battery voltage, then inverter, then controller.
Step 5: The EPEVER 40A MPPT solar charge controller manual is part of the purchase
Here is an admin-buyer secret: the manual is not a piece of paper in the box. It is a procurement document. If the manual does not match the product revision, the site tech will call you at 6 p.m. with a menu question you cannot answer.
Before we ordered our second set of equipment, I found the official EPEVER 40A MPPT solar charge controller manual PDF and saved it to our shared equipment folder. I also printed the relevant parameter tables and put them in a plastic sleeve next to the battery cabinet. That simple step saved us a service call when a technician needed to confirm the correct charging voltage.
I have mixed feelings about manuals in general. On one hand, a lot of them are poorly organized and full of generic safety statements. On the other hand, they contain the voltage limits and menu maps that forums get wrong. The official EPEVER documentation is actually pretty clear once you find the right version, which is more than I can say for some other brands we have bought.
If a vendor cannot provide the product manual and datasheet before you place the order, treat it as a warning sign. A few years ago I approved a purchase from a supplier who only sent a handwritten receipt. Finance rejected the expense, and I ended up covering part of it from the department budget. Now I verify documentation before payment, not after.
Step 6: Verify at receiving, then power up in the right order
The last part of this checklist happens when the boxes arrive.
First, check the label on the unit. Confirm that the model number matches the purchase order and that the label shows the correct battery voltage range and PV input voltage. A 40A controller and a 30A controller can look identical from the outside.
Second, put the unit in the correct startup sequence. With most MPPT charge controllers, the battery must be connected first. Once the controller is powered up from the battery, set the battery type and voltage parameters. Only after that is done should the solar panels be connected. Connecting the panels first can leave the controller without a proper reference voltage and can damage the unit in some cases.
The order we used was:
- Connect the battery bank.
- Set the battery type and absorption/float voltages before going any further.
- Check the solar array open-circuit voltage with a multimeter before connecting the PV wires.
- Connect the solar panels and confirm the LCD starts showing a charging value.
On our smaller depot, I skipped step three because I trusted the installer. The array had been wired with one reversed connection, and the controller shut down instantly. No permanent damage, but the whole commissioning stop became a reset. It would have been a five-minute check.
Common mistakes that cost us time
One mistake buyers make is assuming every EPEVER controller is an MPPT controller. EPEVER sells both MPPT and PWM models, and they serve different purposes. Check the model line before ordering. If the listing is vague about whether the controller is true MPPT or PWM, ask the vendor directly.
The other mistake is undersizing the wire between the controller and the battery. The manual usually includes a minimum wire gauge table and torque values for the terminals. Those details exist for a reason. A loose or undersized connection will run hot, and nobody wants to discover that after the panels have been live for a month.
Finally, do not let a great price convince you to ignore battery compatibility. EPEVER's controllers are flexible, but no controller should be expected to charge every battery chemistry perfectly without the correct settings. There is no such thing as a one-size-fits-all lithium profile. If the battery vendor gives you a charge voltage spec, use it.
To be clear, this is not a sponsored post. We standardized on EPEVER because the local distributor offered decent support and the manuals were available before purchase, which is rare in this industry. Your situation may point you somewhere else, and that is fine. But if you are the non-engineer who suddenly owns the off-grid solar purchase, follow a checklist like this one so you are not making critical decisions at the last minute with a calculator and a vague memory of a YouTube video.
Prices and product generations change quickly. The cost of our 40A controllers was roughly $150 to $190 per unit from a regional distributor as of January 2025, but that is only a reference point. Verify current pricing, confirm the manual revision matches the firmware, and keep every PDF in the same folder as the invoice. Your future self, and the technician on site, will be grateful.