-
Step 1: Set the battery chemistry before you attach anything
-
Step 2: Check PV open-circuit voltage against the controller's input limit
-
Step 3: Set the EPEver inverter charger's mode
-
Step 4: Quote the solar panel tax credit California customers actually get
-
Step 5: If a customer asks about Brightbox battery vs Tesla Powerwall, slow down
-
Before you leave the site: three final checks
Here's the situation: it's 2:00 pm, a customer's off-grid system went down last night, and the replacement parts arrived on your dock this morning. You need power flowing by tomorrow. The box says EPEver. Where do you start?
I've spent six years coordinating emergency solar shipments for installers, and I've handled more than 200 rushed or same-week projects. The failures almost always come down to settings, not hardware. The checklist below has five steps. Step 1 is the one most people skip.
Step 1: Set the battery chemistry before you attach anything
It doesn't matter whether you're configuring an EPEver Tracer MPPT controller or an EPEver inverter charger. Battery profile comes first. If the charger is still on a sealed lead-acid or gel preset, a lithium battery will either undercharge or get overdriven at full. I've watched a controller try to equalize a LiFePO4 bank like it was a lead-acid battery. The BMS hit cutoff, the load dropped, and the customer thought the inverter had died.
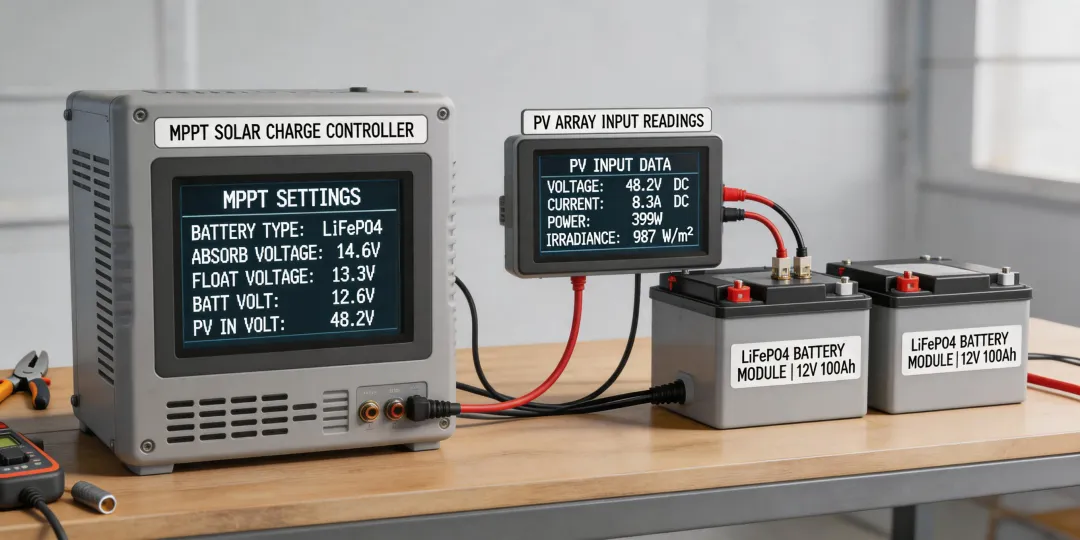
For a 12V LiFePO4 battery, the values I start with:
- Absorption/bulk: 14.2–14.6V
- Float: 13.4–13.8V (confirm with battery datasheet)
- Low-voltage disconnect: 10.5–11.5V
Some battery docs say 14.4V max. Some say 14.6V. Use the exact number from the battery manufacturer, not the EPEver preset. On the Tracer, put the LiFePO4 12V full charge voltage into the user-defined setting before you connect the solar array. It takes two minutes and prevents a week of troubleshooting.
Most buyers focus on MPPT efficiency and completely miss the voltage preset. That's backwards. Efficiency won't kill a $1,500 battery bank. An overvoltage absorb setting will.
Step 2: Check PV open-circuit voltage against the controller's input limit
An EPEver Tracer MPPT can handle a lot of solar input, but only up to its rated maximum. A Tracer with a 150V input limit may be fine at noon in summer, but that same string on a cold morning can spike well above panel nameplate Voc. Calculate it: Voc × number of panels × temperature correction.
My rule: keep cold-day array voltage at or below 80–85% of the controller's maximum. In March 2024, an installer called me after burning up a charge controller mid-project. We replaced it with a Tracer, reconfigured the series string, and it ran through that winter without a hiccup.
Ignore this step and you get to watch magic smoke come out of a brand-new MPPT in front of your customer. Not recommended.
Step 3: Set the EPEver inverter charger's mode
The EPEver inverter charger has its own job: decide where the loads draw power from. In an off-grid solar system, you usually want solar to charge the batteries first and utility to fill in when solar is weak. But many units ship with a default mode that behaves more like a UPS. That can defeat the purpose of having solar at all.
Set the priority based on the customer's goal:
- Solar/battery-first if they want to maximize renewable use.
- Utility-first if the batteries are strictly for backup and outages.
I can't tell you which setting without knowing the site. I can tell you the default is rarely right for a solar + battery system.
While you're in the settings menu, check the inverter charger's battery voltages again. It may have its own LiFePO4 preset with different values from the Tracer. They should agree.
Step 4: Quote the solar panel tax credit California customers actually get
Every emergency quote ends with the same question: “But I get the solar panel tax credit, right?” The short answer: the federal Investment Tax Credit is 30% for qualifying systems placed in service through 2032, subject to IRS Form 5695 rules. The long answer has more caveats.
California doesn't have a separate state tax credit for solar panels. It has rebates and performance-based incentives, like the Self-Generation Incentive Program for energy storage, but those aren't tax credits and the CPUC updates them regularly. If you put “estimated tax credit” on an invoice without checking the program terms, you're creating a problem for the customer and for yourself.
Per FTC advertising guidelines, claims about tax credits and savings must be truthful and not misleading. In a rush, it's tempting to hand-wave the details. That's when a customer hears a different number at tax time and blames the installer. Verify the source, include it in the quote, and move on.
And don't promise a “double discount” between the federal credit and a state incentive unless the rules actually stack. Some do. Some don't. This isn't tax advice—just advice from someone who has had to rebill a customer after misreading a program. Verify, then quote.
Step 5: If a customer asks about Brightbox battery vs Tesla Powerwall, slow down
“Brightbox battery vs Tesla Powerwall” is a common comparison, but in an emergency solar context it's not really about the battery. It's about the whole installation model.
Tesla Powerwall and Brightbox (Sunrun, often using LG or similar battery modules) are normally sold as complete, contractor-installed systems. A system built with EPEver components is different: you're mixing the MPPT charge controller, inverter charger, and battery bank to match the site. It's more flexible, but the customer has to know who maintains it and who supports it.
When a customer asks which battery is better, ask them what loads they need to back up, what voltage they want, and how they'll service the system. Don't get pulled into “bigger capacity” or “same price” claims without checking usable capacity, continuous output, and installed cost. FTC comparison-ad rules exist for manufacturers, but installers should hold themselves to the same standard.
I've seen clients reject a properly sized EPEver system because someone compared it to a turnkey battery the wrong way. Ask the right questions first.
Before you leave the site: three final checks
- Re-check the DC breakers after setting up the MPPT and inverter charger. A loose terminal defeats even the best settings.
- Verify the battery type shown on the physical display, not just the app. Screens are useful, but not perfect.
- Log the voltage settings and leave them with the customer. When something acts up, you'll both have a record.
There's something satisfying about a rushed solar install that comes up clean on the first try. After the voltage readings are stable and the inverter charger switches over without drama, that's the payoff. Get these five steps done, and you might even get home before dark. A clean first-time install is the strongest sales pitch you have.