First, the credentials that make this worth your time: I'm an off-grid system integrator who has handled EPEVER orders for eight years. I've personally made—and documented—14 significant mistakes, totaling roughly $12,000 in wasted budget. The checklist below is the one I now give every new installer on my team. It's not beautiful, but it has kept us from repeating most of my old errors.
If you found this because 'wall of fire solar system' is in your search bar, I don't blame you. I have never actually seen a solar array turn into a wall of fire. But I once watched a 100A charge terminal get so hot under load that the insulation on the adjacent battery cable started bubbling. Close enough.
Who This Checklist Is For
Use this before commissioning a system that includes:
- An EPEVER 100A MPPT solar charge controller (or any EPEVER MPPT, really)
- An EPEVER inverter for AC output
- A LiFePO4 battery bank whose manual you have not memorized
If you're in a hurry, that's fine. This list is in order. Do not skip step 5. That's the one that caught most of our problems in the last 18 months.
The 8-Step, Order-of-Operations Checklist
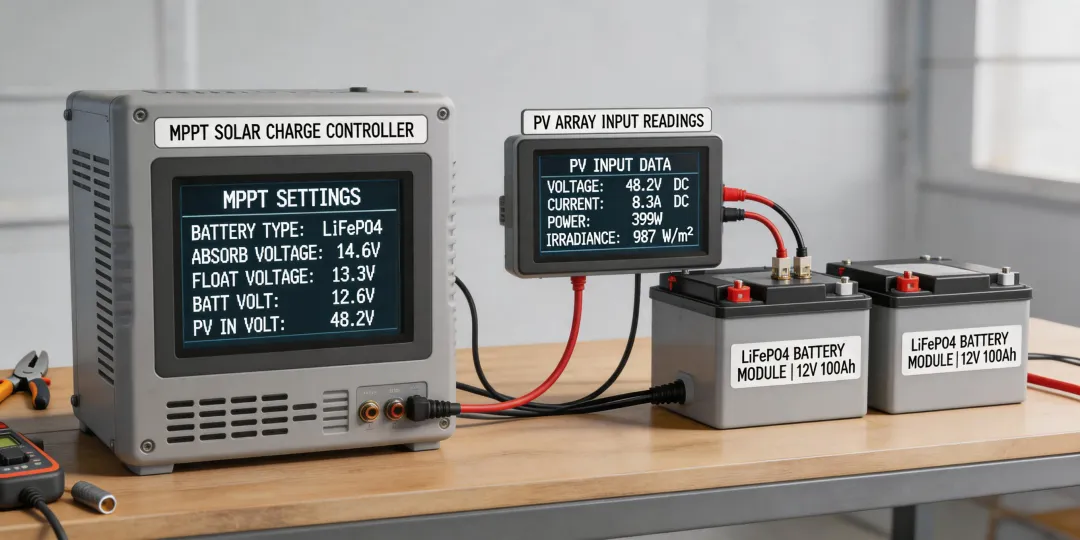
Read the LiFePO4 battery manual before programming the EPEVER. I know, manuals are boring. The 'lithium' preset on the EPEVER is a starting point, not a custom cell-by-cell profile. Your LiFePO4 battery manual should list absorption voltage, float voltage, equalization (usually disabled), and low-temperature cutoff. If it says 14.4V bulk and 13.8V float, use those. If it says 14.2V and 13.6V, use those instead. I do not care which number family your battery uses, as long as the numbers come from the manual and not from a forum.
Check the controller's maximum PV voltage at your lowest temperature. Panel Voc goes up when panels get cold. Take the open-circuit voltage from the datasheet, multiply it by the NEC 690.7 correction factor for your coldest record temperature, and make sure the result is below the EPEVER 100A controller's max PV input. I once wired three '47.2V' panels into a 150V controller. A 20°F cold snap pushed the string above 160V, and the controller stopped charging for three days. If I remember correctly, that was a $2,800 mistake plus expedited freight.
Size the battery wire for 125% of the charge current, not for the 'average' current. A 100A controller can pull the full 100A into a low LiFePO4 bank. That means 125A minimum wire ampacity before temperature derates. Use the NEC 690.8 method. This was accurate as of January 2025; code editions change, so verify your local rules.
Wire the EPEVER inverter like it is part of a building, not a toy. Check neutral-ground bonding. In a typical off-grid system, you bond neutral to ground at exactly one point. If the EPEVER inverter has an internal bonding relay or a removable screw, understand what it does before applying power. Also check the listing—UL 1741 for North American grid-interactive equipment, IEC 62109-1 in many other markets—if your AHJ asks.
Torque every DC and AC terminal to the spec in the manual. Not 'tight enough.' Not 'electrician's wrist torque.' Use an inch-pound torque screwdriver, and do it twice—once on initial assembly, again after the first 24-hour run. This is the step most installers skip, and it is the one that caught 47 connection issues for our team in the past 18 months.
Run a full thermal test before you walk away. Put a real load on the system—electric heater, toaster, water heater—and let it run for at least an hour. Then inspect every connection with a thermal camera. A terminal that is more than 15–20°C above its matching neighbor means you have resistance. If a terminal smells hot, that is your wall-of-fire warning. Don't ignore it.
Verify the battery profile after any controller reset or firmware update. I have seen a field technician set the profile correctly, then the controller rebooted and went back to a lead-acid preset. The result was a charging profile that did not match the battery manufacturer's specification. A 20-second review of the settings screen would have caught it. Oh, and a printed commissioning sheet in the panel would have caught it even faster.
Record the settings and leave a printed sheet in the panel. In five years, the person fixing the system will not know your password. If you leave a diagram and a settings table, the next person does not have to guess. And if you ever find yourself searching 'wall of fire solar system' after an installation, the settings sheet is where the answer usually is.
Are Bifacial Solar Panels Better?
Short answer: sometimes. On a ground mount with a high-albedo surface—crushed rock, white membrane, even grass—bifacial panels can add meaningful rear-side gain. NREL research shows bifacial gains from a few percent to more than 20%, depending on mounting height, tilt, and reflectivity. On a dark shingle roof with panels mounted close to the deck, the gain is often too small to justify the extra cost.
From an installer's perspective, the bigger issue is current. Bifacial panels add current from the rear. If your strings are already sized to push the EPEVER 100A controller to its limit on paper, a bright day with snow on the ground can push you over. Plan for that extra current in the controller rating and in the wiring calculations.
To be fair, I used to dismiss bifacial panels entirely. Then I worked on a gravel-mounted commercial array where the bifacial strings visibly out-produced the monofacial strings after a snow event. The data was real. But it was not better for every roof.
Paying for Certainty Is Not Overpaying
One lesson runs through every mistake above: a close deadline is not a reason to accept an uncertain part. In March 2024, I paid $400 extra for guaranteed next-day freight on a replacement controller. The alternative was missing a $15,000 event load. The freight cost hurt. The delay would have hurt more.
Had two hours to decide before the freight cutoff. Normally I'd compare vendors and wait for quotes. With no time, I went with the supplier I had used before and told them exactly what I needed. That is not 'shopping.' That is buying certainty.
The same logic applies to choosing between an 'in stock maybe' supplier and a 'ship date guaranteed' supplier. If you are on a deadline, the uncertain cheap option is the expensive one.
What Almost Became a Wall of Fire
If the phrase 'wall of fire solar system' brought you here, let me reassure you with one fact: most solar fires start at bad connections, not faulty panels. The charge controller usually survives. The terminal does not.
I once melted a breaker lug because I trusted a hand-tightened set screw. Actually, not a breaker lug—it was a fuse holder. The mistake cost $890 in repairs plus a 1-week delay. I've also seen a busbar cover blackened because someone skipped the torque chart. Those are avoidable.
Before you commission your EPEVER system, walk through this checklist one more time. Then take photos of the wiring and settings. Not because you are paranoid, but because 'I think I set it correctly' is not a commissioning report.