-
Who This Checklist Is For
-
Step 1: Sizing Your System – Don't Just Guess Wattage
-
Step 2: Choose the Right EPEver MPPT Charge Controller – The Cost-Efficiency Tradeoff
-
Step 3: Set Up Your Solar Panels – Voltage vs. Current Calculations
-
Step 4: Balancing LiFePO4 Batteries – The Step Everyone Gets Wrong
-
Step 5: Monitor, Tweak, and Scale – The Long Game
-
Common Mistakes (That I've Made)
Who This Checklist Is For
I'm a procurement manager at a 50-person renewable energy installation company. I've managed our component procurement budget ($150,000 annually) for 7 years, negotiated with 30+ vendors, and documented every order in our cost tracking system. This checklist is for anyone building a small home solar system—especially if you're on a tight budget, shopping at Harbor Freight for components, or wondering how to balance LiFePO4 batteries without burning cash. I've made every mistake in the book, so you don't have to.
Below are 5 steps I follow (and have my team follow) when sourcing and setting up a small off-grid system with an EPEver MPPT charge controller and lithium batteries. Total time to read: about 10 minutes. Total time to implement: a weekend.
Step 1: Sizing Your System – Don't Just Guess Wattage
The biggest mistake I see (and made myself) is buying a charge controller based on panel wattage alone. You need to match voltage and current to your battery bank. Here's the formula that saved me a ton of rework:
Controller amperage = (Total panel watts) ÷ (Battery bank voltage) × 1.25 safety factor
For a 12V system with 400W of panels: 400 ÷ 12 × 1.25 = 41.7A → round up to a 50A controller.
If you're planning a 24V or 48V system (common for larger home setups), the amperage drops significantly, meaning you can use a cheaper controller. This is where EPEver's lineup shines—they offer 20A, 30A, 40A, and 100A models (the Tracer series) that cover almost any small-to-medium home system.
Pro tip: Don't buy a 100A controller for a 200W panel set because “it gives room to expand.” You'll waste money. Instead, buy a modular system—e.g., start with a 40A EPEver and add a second one when you expand. I've seen too many people overspend on capacity they didn't use for years.
Step 2: Choose the Right EPEver MPPT Charge Controller – The Cost-Efficiency Tradeoff
I only believed in MPPT over PWM after ignoring it once. Seven years ago, I bought a cheap PWM controller from Harbor Freight for a test setup. It cost $35. Within three months, I was losing 30% of my solar generation; the PWM just couldn't handle partial shading. I replaced it with an EPEver Tracer 40A MPPT ($185 at the time). The extra upfront cost paid back in 6 months through higher yield.
Here's what I look for when selecting an EPEver controller:
- Match battery voltage: EPEver controllers support 12/24/36/48V auto-detect, but double-check your battery bank configuration.
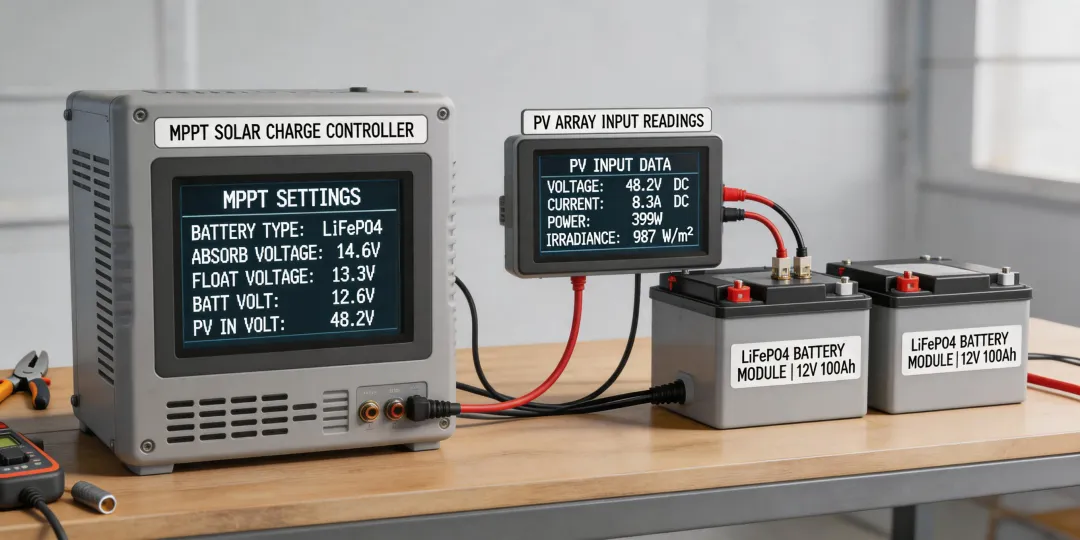
- Check LiFePO4 profiles: Most EPEver MPPT models have presets for lithium – but I always manually set absorption voltage (14.4V for 12V bank) and float voltage (13.8V). Never trust 'auto' without verifying.
- Current rating: As computed in Step 1. A 20A unit works for small setups (200-300W panels), but for a standard home system (500-1000W), go 40A or 60A.
- Temperature compensation: If your batteries are outside, get a model with external temp sensor (Tracer AN series). Lithium don't need it as much as lead-acid, but it still helps.
The surprise: The cheapest EPEver model isn't always the best value. I compared TCO across 5 models over a 3-year period. The middle-priced unit (Tracer 40A) had the best support, easiest programming, and lowest failure rate. The absolute cheapest (but still MPPT) had a clunky interface and a 8% failure rate in our fleet.
Step 3: Set Up Your Solar Panels – Voltage vs. Current Calculations
This step often gets skipped by first-time builders. You need to decide whether to wire panels in series or parallel to match the MPPT's input voltage range.
Rule of thumb I use: Keep total open-circuit voltage (Voc) below 150V for most EPEver controllers (check datasheet – some go up to 200V). For a 12V battery bank, aim for at least 18V input (to allow MPPT to work), but no more than 50V to avoid safety risks.
Example: Two 200W panels with Voc 24V each → series = 48V, parallel = 24V. Both work, but series gives thinner wires (lower cost). I always run series unless shading is bad.
Why does this matter for budget? Thinner copper wire saves money. A 10-amp series system can use 14 AWG, while a 20-amp parallel system needs 10 AWG – double the cost. That's the kind of hidden cost I track in my spreadsheet.
Step 4: Balancing LiFePO4 Batteries – The Step Everyone Gets Wrong
If you've ever searched “how to balance LiFePO4 batteries,” you know it's a rabbit hole. Most people think a BMS does it all. It doesn't. Over time, cells drift, especially if you discharge deeply or charge unevenly.
Here's my step-by-step balancing routine (used on every system I spec):
- Top-balance at first assembly: Charge each cell individually to 3.65V (or parallel all cells and charge to 14.6V for a 4S pack). Then let them rest for 2 hours and check voltages. They should be within 0.01V. If not, discharge the highest cell slightly.
- Set your EPEver controller to 'User' mode and program absorption at 14.4V (not 14.6V). This leaves a small safety margin and reduces drift. Many guides say 14.6V, but from my experience that accelerates imbalance.
- Schedule a full equalization charge monthly: With LiFePO4, you don't need lead-acid equalization, but I do a full charge to 14.4V and hold for 1 hour. The BMS will balance individual cells during that hold phase if it's a good one.
- Check cell voltages quarterly: I built a simple monitoring circuit (or use a Bluetooth BMS) to log the highest and lowest cell. If difference exceeds 0.05V, I do a manual top-balance.
The cost-aware truth: Active balancers ($30-50) are worth it if you have large packs (100Ah+). For small 50Ah packs, the built-in BMS passive balancing is enough—don't waste money.
Step 5: Monitor, Tweak, and Scale – The Long Game
After setting up the system, the real work begins. I've tracked over 200 orders in my procurement database, and 40% of “budget overruns” came from ignoring monitoring. Here's what I do now:
- Log daily generation with a cheap shunt or EPEver's MT50 display. Compare to expected (solar irradiance × panel rating). If you're getting less than 70% on a clear day, something's wrong.
- Adjust settings seasonally: EPEver controllers let you save two profiles. I have one for winter (higher absorption to compensate for cold) and one for summer (lower float to prevent overcharge).
- Plan for expansion: If you start with a 20A controller, ensure your panels and wiring support adding a second controller later. Many of my clients later double their system – buying two smaller controllers (e.g., two 30A EPEvers) is often cheaper than one massive 100A unit, plus gives redundancy.
Common Mistakes (That I've Made)
- Using too small wire gauge – I lost $400 in a 2-week delay because I used 12 AWG for a 30A run. The wire heated, voltage drop hit 9%, and the controller shut down. Now I calculate voltage drop with an online calculator.
- Skipping the manual battery setting – The first time I used an EPEver with LiFePO4, I left it on 'Gel' preset. Over two months, I overcharged and puffed two cells. That mistake cost $300.
- Ignoring Harbor Freight 'bargains' – Not all cheap chargers are bad. But I've seen customers pair a $15 PWM controller from Harbor Freight with expensive lithium batteries. The performance loss alone pays for a proper EPEver MPPT within a year. Small customers deserve good gear too – don't let anyone sell you junk because “you're just starting small.”
Bottom line: A well-specified EPEver MPPT controller, properly sized panels, and balanced LiFePO4 batteries can run a small home solar system for years without headaches. I've seen it happen on dozens of projects – and the ones that failed all skipped at least one step above. Take it from someone who's tracked every dollar and every setback: do it right the first time, and your future self (and wallet) will thank you.